Showing posts with label art classes. Show all posts

Wednesday, July 6, 2011

Radical Rainforests and Let's Play Music

Next week at Hobble Creek Learning Center!

Radical Rainforest
July 11-15, 10:00-11:30 am (4-7 years)  $50
The rainforest is full of interesting animals: poison dart frogs, toucans, and jaguars to name a few.  Children will learn about this incredible ecosystem while creating art that is equally amazing.

Let's Play Music: Blue Bugs
Six 50-minute lessons (T, TH)
July 12 & 14, 19 & 21, 26 & 28            
9:00-9:50 am, (3-4 year olds)  $40
Students will learn, through play, to feel a steady beat, imitate rhythmic patterns, read rhythmic notation, and play in a rhythm ensemble.

Let's Play Music: Red Balloons
Nine 50-minute lessons (T, W, Th)
July 12-14, 19-21, 26-28                                                10:00-10:50 am, (4-5 year olds) $60
Students will learn, through play, to match pitch, use solfeggio hand signs, recognize simple staff notation, hear and sing both melody and harmony, and play a major scale and simple accompaniment on tone bells.

Let's Play Music! believes that young children are capable of learning complex musical skills, and that children learn best through full body involvement--playing, dancing and singing.

To register call 801-491-0825

Monday, March 7, 2011

Mommy, Monet and Me! Letter S

St. Patrick's Day Art!

At Hobble Creek Learning Center we love St. Patrick's Day.  This week in MMM our letter was S so we did St. Patrick's Day Art.  We made the color green and painted shamrocks, we made shamrocks using heart shapes, and we painted beautiful glossy rainbows. 

Green

Materials: blue paint, yellow paint, spoon, ziploc bag, painbrush


Today I let the kids mix their own green paint using a small ziploc bag.  We just put a spoonful of blue paint, and yellow paint and then made sure the bag was closed securely.  Then I just let them move, and squish and swirl the paint until they made green.   Then they used a small paintbrush to dip in the bag and paint shamrock coloring page.  So simple, but there is something magical about mixing that paint!

Heart Shamrocks

Materials: Heart shaped cookie cutters, green stamp pads or paint, paper

I realized recently that Shamrocks are really hard for little kids to draw, but you need shamrocks to properly celebrate St. Patrick's Day.  When you look at a shamrock it is basically 3 or 4 heart shaped leaves joined together.  So I took our heart shaped cookie cutters and pressed them into the stamp pad, and then onto the paper and it makes a perfect shamrock!  The shamrock outline can then be colored in or painted. 

Glossy Rainbows

Materials: Food coloring, corn syrup, paintbrushes, large paper.

One of my favorite art activities is using corn syrup to paint.  Did you know that corn syrup is used to make magazine covers glossy?  The beautiful thing about painting with corn syrup is that it stays shiny when it dries.  So we combined corn syrup with all of the colors of the rainbow, each in its own container.  Then we painted beautiful rainbows.  Beware this can be a very sticky endeavor, but it cleans up easily with a little water! To minimize the mess let paintings dry flat overnight.

Come to our St. Patrick's Day party on Saturday March 12th from 10:00-Noon for more St. Patrick's Day fun and prizes.  See you there!

Wednesday, February 23, 2011

Jr. Artists: Printmaking

 Here are some pictures from our latest Jr. Artist class.  We learned how to do basic printmaking using styrofoam plates.  To see more pictures visit our flickr site.

Jr. Artists meets every tuesday from 4:00-5:00pm.  Our class is full right now, but we may open another section.  If you are interested in joining our class please call 491-0825 and get on our waiting list. 

Join our Facebook page to get updates on class availability and our upcoming summer programs!  Our schedule of summer programs will be available March 12th. 

Wednesday, February 16, 2011

Jr. Artists: Winter Watercolors

Here are some pictures from our winter watercolor project.  We used painters tape, salt, blue watercolor and crayons to create our beautiful pictures!   See more pictures on our Flickr page.  Next week we will be working on printmaking!


Monday, February 14, 2011

Mommy, Monet and Me! Valentine's Day

Happy Valentine's Day!

Today in MMM we did three Valentine's Day art activities!  Foam Printing, Heart Stencils, and Mixing Pink.
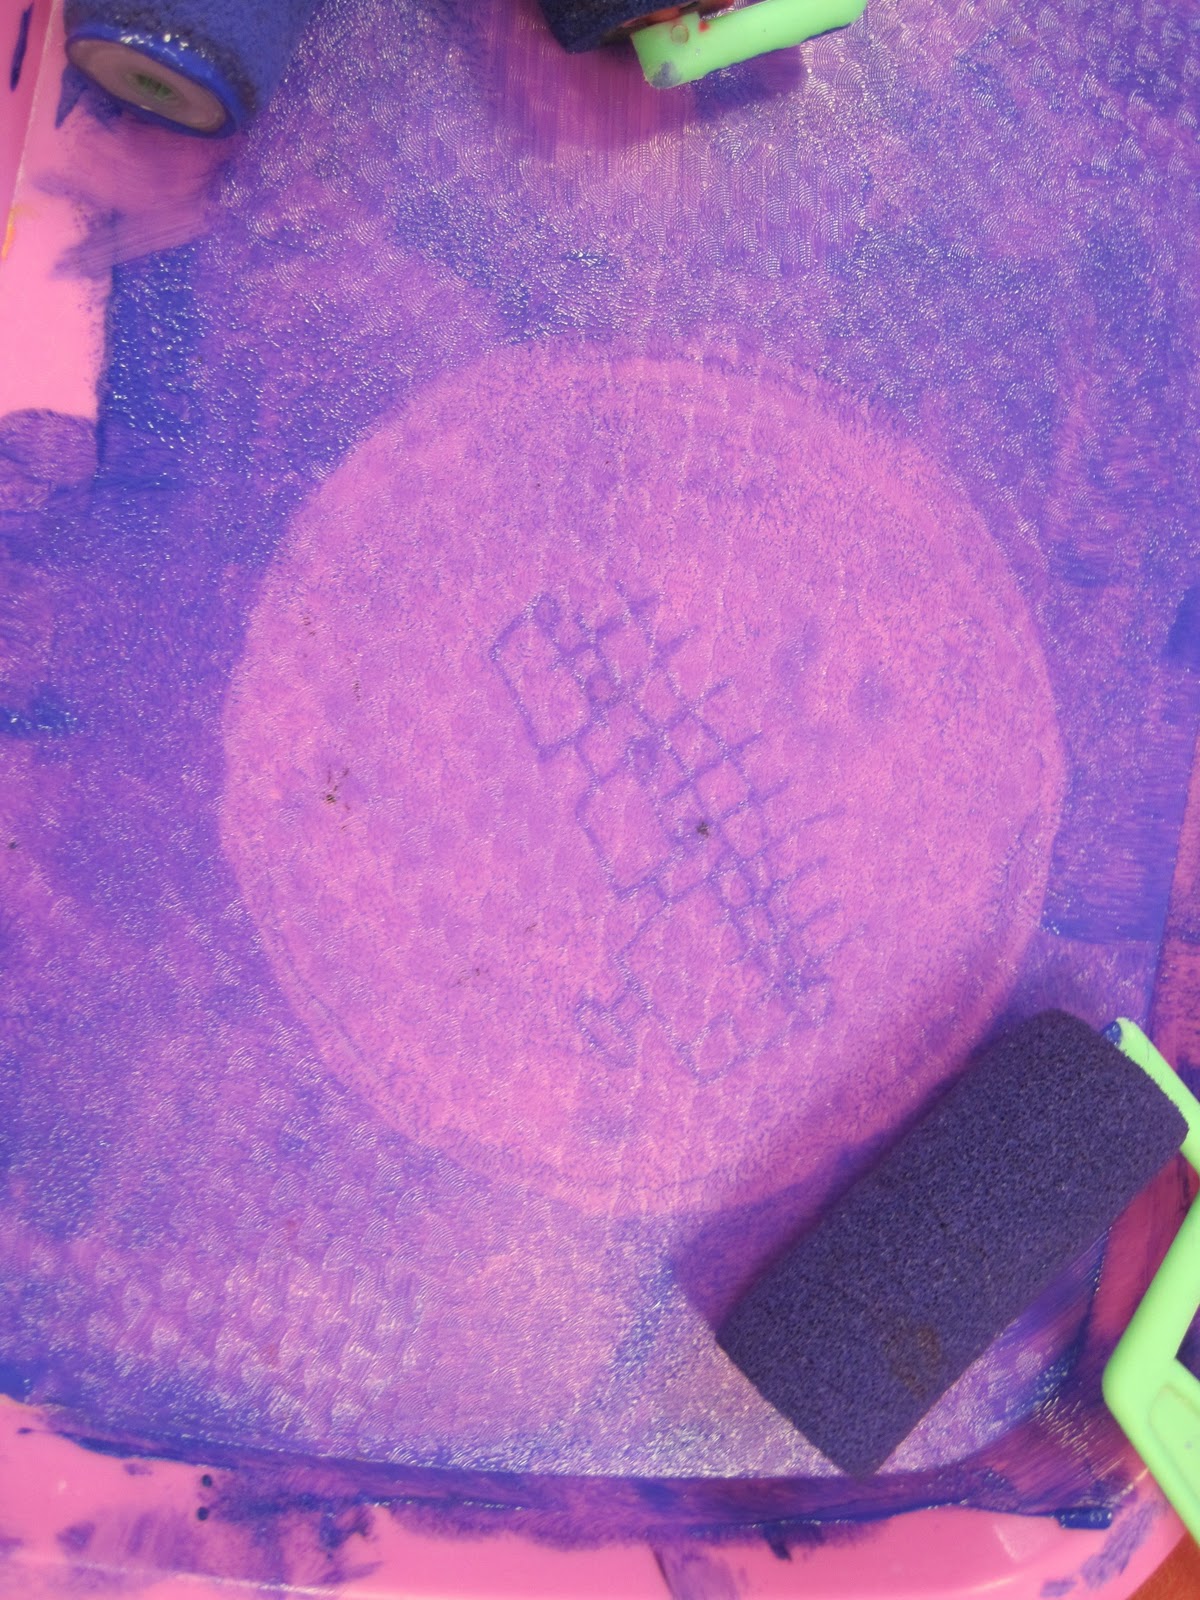
Styrofoam Printing

Materials: Styrofoam plate, dull pencils, paint, paint rollers, tray, paper.

1. First draw your design on the back of a piece of styrofoam with a dull pencil.  Use the pencil to gently carve into the styrofoam leaving an indentation.  I like to use a plate because the lip of the plate gives the kids a handle when they are printing, but you could use any flat piece of styrofoam.  Save and reuse packing materials for this project.

2. When your design is complete roll a thin layer of paint out on a tray or cookie sheet.  Help your little one make it really thin.

3. Then turn your plate over and press your design into the plate (make sure to press each part of the plate down to get good contact with the paint).

4. Pull the styrofoam up and press firmly down onto the paper (again make sure to get good contact on the whole piece of foam).

5. Remove the plate and see your beautiful design on paper. 

This is a great way to make unique Valentine's because you can reuse the plate and make multiple prints of the same design.  Try mixing colors of paint or printing on different kinds of paper.  The possibilities are endless.  Print on card stock to make a beautiful one of a kind card for teachers or grandparents!

Homemade Heart Stencils

Materials: Paper, scissors, paint or bingo markers

1. First cut out heart stencils by folding paper in half and cutting half of a heart from the fold.  Cut a variety of hearts in different shapes and sizes.  Make sure to leave a border, don't cut your heart all the way to the edge of the paper.

2. Now you should have a positive and negative heart shape.  In other words a heart shaped piece of paper, and a heart shaped hole in the other piece of paper.
3. Place your heart stencils on a large piece of paper and use bingo markers to stamp around the edge of the heart shapes, and to fill in the heart stencils.   You could also use markers, crayons, or paint for this step.

This is a great lesson to help your child understand the difference between positive and negative space.  
 
Mixing Pink

Materials: Heart shaped paper, white paint, red paint, paintbrushes

Today we used red and white paint to make beautiful pink paint.  Simply give your child a dish or cup with each color of paint and one paintbrush and let them experiment with color.  They can mix the color on their heart or in the cups.

Each child's shade of pink was a little bit different, but we ended up with so many beautiful pink hearts to decorate our room for valentine's day!

No class next monday because of President's Day!  We will see you again on February 28th, 9:30-10:15 am for the letter R!

Monday, February 7, 2011

Mommy, Monet and Me! Letter Q

 Queens (and Kings), Q-tips, and Chinese New Year Dragons

Some letters of the alphabet are definitely more difficult than others.  Q is one of them.  If anyone out there has fabulous Q art ideas send them my way.  Here are some of mine, and we also threw in dragon puppets for Chinese New Year!

Queens (and Kings)

Materials: Yellow paper, Decorations, Markers, Crayons. 

Simply cut a zig zag line down the middle of a yellow piece of paper.  When you are done you should have two crown like pieces.  I staple these two pieces together and let the little kiddos decorate however they would like.  We used sparkly jewels that we bought from discount school supply, which made the crowns seem super special.  When the crown is decorated, wrap it around your child's head to measure, then remove and staple again to make a crown!  So simple, yet so much fun.


Q-tips
 
Materials: q-tips, watercolor paints, water, paper

Q-tips are a great alternative to painting with brushes for watercolors.  The q-tips are easily manipulated by little fingers, the paint and water distribution is controlled, and the clean up is easy!  I also love that q-tip can get the last remnants of paint out of an old set of watercolors

Dragon Puppets (Chinese New Year)

Materials: Dragon Face, Paper Plate, Crayons, Markers, Scissors, Paper Strips, Paint Stick, and Hot Glue Gun

1. Color and cut out dragon face printout
2. fold paper strips back and forth to create a crinkled look, and glue to paper plate.
3. Glue dragon face on top of paper strips.
4. Attach a paint stick to the back with hot glue.

For more pictures from our class check out our flickr page.

Art Adventure Photos

Chinese Pagoda
 Here are some pictures from our Chinese New Year Art Adventure!  Check out our flickr page to see more photos.

Our next art adventure is Wonderful Wizards!  It will be Saturday March 26th from 1:00-2:00 pm.  Sign up early to reserve your place!

Remember you can get one free art class (Mommy, Monet and Me, Junior Artists, or Art Adventure) when you join our facebook page. 


Chinese Dragon Puppet

Firework Picture

Monday, January 31, 2011

Mommy, Monet and Me! Letter P

Puff Paint, Playdough and Purple!

Puff Paint

Materials: Salt, Flour, Water, Food Coloring, Squeeze bottles, Cardstock

Thanks to Ettie Smith for sharing this recipe with me.  It has become one of my favorite art activities and the kids love it.  Making the puff paint can be just as fun as using it.  The recipe is simple and you and your child can experiment making lots of new colors with food coloring.  

RECIPE: Add equal parts flour, salt and water in a bowl.  Mix thoroughly until smooth and shiny.  Divide white dough into smaller containers for color mixing.  Add food coloring and mix until you reach desired color.  Put puff paint in squeeze bottles, use like regular paint or finger paint.


I recommend using the puff paint on cardstock.  It holds up better to the heavy paint and doesn't soak through.  Encourage your little one to see what happens when you put one color on the other, or swirl the puff paint with a toothpick to create a marbled effect.


Play Dough

I like to make my own play dough rather than buying it.  You can make big batches with ingredients you have on hand, and then you can let your kids mix it without being so worried about ruining expensive play dough.  This is my favorite play dough recipe because it is so soft and smells great!

Materials
 • 1 1/4 cup flour
 • 1/4 cup salt
 • 1 pkg unsweetened Kool-aid (just the dry koolaid, don't mix it into juice)
 • 1 cup boiling water
 • 1 1/2 Tbsp vegetable oil

Directions:
 1.  In a bowl, mix flour, salt and kool-aid.
 2.  Stir in water and oil
 3.  Knead with hands for about 5 minutes (careful it's hot!)
 4.  Store in ziploc bag for up to 2 months.


 Purple


More color mixing today!  We made the color purple using red and blue paint.  We used paintbrushes and our fingers to combine the colors.  If you don't have red and blue paint on hand try mixing other things with your toddler or preschooler.  Here are some ideas. 


Koolaid or juice
Water with food coloring.
Crayons
Markers
Remember MMM is every Monday morning from 9:30-10:15am.  Try a class for free when you join our facebook page.   

Also join us this Saturday for our Chinese New Year Art Adventure!  Saturday February 5th from 1:00-2:30 pm.  Advanced registration preferred.  Space is limited.  


Monday, January 10, 2011

Mommy, Monet and Me! Letter N

Noodles, Necklaces and Night!

Today in MMM we made sparkly noodles and then made them into necklaces.  We also created beautiful winter night paintings.  

Sparkly Noodles

Materials: Pasta Noodles (any kind with a hole in it), white glue, glitter, plastic spoons, tray or bowl for glitter.

This a fun way to make sparkly beads for a homemade necklace.  Simply take a dry pasta noodle, drop it in some watered down glue, fish it out and let the excess glue drip off and then use a spoon or little fingers to roll it in glitter.  All kids love glitter, but mom's usually don't.  This is a good way to do glitter without making too much of a mess.  You could also put the noodles in a tupperware with a little glitter or a plastic bag, seal it up and let your little ones shake away until the noodles are covered.   Let the sparkly noodles dry before stringing them on a string or pipe cleaners. 

Noodle Necklace

Materials: Sparkly Noodles, Pipe Cleaners, other beads

Making a necklace is a great way for toddlers to work on those fine motor skills.  I have found that it can be really difficult and frustrating for little fingers to work with string or yarn for necklaces, especially when the string is dropped and beads scatter everywhere, so I use pipe cleaners.  Pipe cleaners are great for a few reasons...they come in so many colors, they can be twisted together, they are rigid and easier for little ones to manipulate, and they have enough friction to keep beads... or noodles in place.

Winter Night Painting

Materials: Watercolor paper (or cardstock), Masking Tape, blue or black paint, crayons or oil pastels, salt (optional)

This lesson is adapted from the blog Art Projects for Kids. 

For our night time painting we started with half sheet of watercolor paper and some masking tape.  Tear medium length pieces of tape for your toddler.  I like to tear the tape down the middle to get a wavy edge.  Then use smaller strips of tape to make branches off of the main trunk until you have a beautiful masking tape tree.  Encourage your little one to rub the tape down so the edges are flat. 

Next, use a crayon or oil pastel to make stars or snow in the sky.  They can just tap the crayon randomly all over the paper and it looks great!  You could also draw a moon in the corner. 

Apply the paint.  I use blue tempra paint that is pretty watered down, any watery blue paint would work.  Blue from a watercolor tray would work, but the other colors on the tray often prove too tempting for toddlers.  Paint all over the whole picture, even on top of the masking tape. 

While the paint is still wet sprinkle a little salt over the top of your picture.  The salt soaks up some of the water and leaves a cool winter texture behind.  It kind of makes it look like it is snowing. It's amazing how exciting the prospect of sprinkling salt is to a 3 year old

When your picture is dry, carefully remove the tape and check out the cool trees left behind on your paper.  Remember it is the process not the product that matters.  Every tree is different and your toddlers should not look perfect, let them create freely!

Wednesday, January 5, 2011

Winter Art Classes! Now Enrolling

Styrofoam Plate Print by Emily
Sign up for art classes starting this February!

After taking a semester off to get used to motherhood Julie Hall is back to teach new and exciting art classes.  Space is limited so sign up early!

Junior Artists (5 and Up)
Tuesdays 4:00-5:00pm. (February 1-April 5)
Cost: $85.00 for 10 weeks.  
Cost can be prorated.  Advanced registration required.
In this exciting class students draw, paint, sculpt and discover the fundamental art elements: line, shape, texture, color, value and space. At the end of 10 weeks students display their work in a special gallery night for friends and family! Instructor: Julie Hall


Art Adventures
(Children 5 and under need to be accompanied by an adult)
Cost: $5.00 per child or $13.00 per family
Special Saturdays: 1:00-2:30pm

February 5
    Chinese New Year!
March 12      Annual St. Patrick's Day Party (10:00-Noon) FREE
March 26      Wonderful Wizards
May 7           Under the Sea

Bring your friends and family for our Saturday art adventures. Participate in 3 different art activities, scavenger hunts, games, and riddles.  In the past we have gone on  a safari, traveled to space, and searched for dinosaurs!  Check out pictures from our art adventures.  Advanced registration preferred.


Monday, January 3, 2011

Mommy, Monet and Me! Letter M

Check here each Monday afternoon to see what fun projects we did in Mommy, Monet and Me! MMM is every monday morning (except for holidays) from 9:30-10:15 am at Hobble Creek Learning Center.

Today in Mommy, Monet and Me our letter of the day was M. So we had three M related toddler friendly projects: Marble Painting, Marker Magic, and Monoprints! All three activities are so fun with kids of any age.


Marble Painting

Materials: Paint, Marbles, Spoon, Box Lid (or something like it)

For marble painting I get an old box lid that will fit a piece of paper. Tape the paper down to the inside of the lid so it won't shift when you start painting. Get a few marbles and place one or two in each paint color (I water down the paint a little so the marble will roll easily). Have your child use the spoon to drop one or two marbles in the box lid, and start moving the box so the painted marbles roll all over your paper! A box lid with high sides is best so that you don't lose your marbles! I like to use red, yellow and blue paint so when the colors mix they make new colors!


Marker Magic

Materials: Constructions paper, scissors, dry erase markers, old sock or rag (to erase with)

I cut out some simple frames out of construction paper and taped them to the window. This serves two purposes. First, it makes drawing on the window even more special and fancy, and second it will give your toddler and natural boundary for their artwork. They are usually pretty good at staying in the frame. I always preface this activity by reminding our little artists that these are special markers and we can't use regular markers to draw on the windows and we never draw on the walls:) Let your toddler use dry erase markers to draw on the window, and a rag or old sock to erase and start again. They will have so much fun creating their masterpieces, and when they are all done the picture is framed and on display!


Monoprint

Materials: Baking tray or other flat smooth surface, paint, small paint roller or paintbrushes, q-tips, scrap paper

This activity was the favorite of the day! The kids stayed at this station the longest and loved printing new pictures over and over again. This is a basic printing technique to create one of a kind prints. Simply apply paint thinly to the inside of the baking tray (I use small paint rollers like this). You can also use a paintbrush to apply the paint. Then let your little one use a q-tip, or their fingers to make lines and designs in the paint. When they are satisfied with their creation press a piece of paper onto the tray and voila! A beautiful monoprint! I love this activity because the mess is contained within the tray and the results are beautiful. I also recommend using primary colors for this activity so the mixing paint creates beautiful new colors!


Remember moms: creativity takes courage! Don't be afraid to get a little messy, your kids will love it!

Thursday, January 22, 2009

Come on an Art Safari!


Saturday, February 7, 2009
NEW TIME 1:00-2:30pm
$5.00 per child or $13.00 per family
All ages: children under 5 need to be accompanied by an adult.

Come experience the thrill of the hunt as we search for exotic animals and African ARTifacts. Learn to draw animals from BYU's Bean Museum, make your own binoculars, make an African mask, and watch out for lions!

Advance registration preferred. Sign up today! Call 801-491-0825
For more information contact Julie Hall @801-836-0506
or visit www.hobblecreeklearning.com